Author: q0tm10rs639g

  • MiniScript-Farmtronics

    Farmtronics Scripts

    Scripts for Stardev Valley – Farmtronics mod that automates watering plants.

    Installation

    • Copy files with .ms extension from project to /usr/lib directory (create if doesn’t exist)
    • You can find the directory mentioned above in “C:\Users\<User Name>\AppData\Roaming\StardewValley\Saves\<Save>\strout.farmtronics\usrdisks\<Some Numbers>\”
    • Start the game on your save and open console by right-clicking Bot or by TV FarmtronicsHomeComputer option.
    • You should be in “/usr” directory. Type dir in the console and click ENTER. Right below command you should see “/usr :” and list of files and directories.
    • Open “startup.ms” by executing commands:
      • load “startup”
      • edit
    • On top of file add line ‘import “wateringBot”‘
    • Click ESC and in console execute command “save”

    alt text

    alt text

    alt text

    Additional configuration

    You can set Bot position after work and water source position in “wateringBot.ms” file in “lib” directory. Values for both positions are on top of file. Remember that water source position should be position next to the water. Direction in which water is from set position should be set in “directionToWater” variable.

    alt text

    alt text

    Additional information

    • If the bot encounters Player or Animal on it’s path, it will wait until the path is clear.
    • There is no way for bot to go through fence or gate, so fields and water source shouldn’t be fenced off.
    • Bot can pass through scarecrows and trellis crops.
    • Remember that the bot works only when you are on the farm.
    • Bot will only water fields with some crop planted on it.

    Acknowledgments

    Visit original content creator repository 
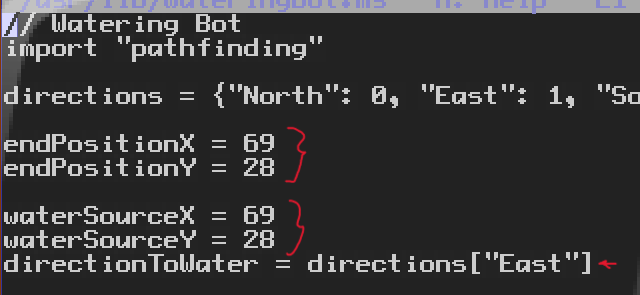
https://github.com/TwentyFifthNight/MiniScript-Farmtronics
  • openwrt-galileo

    Visit original content creator repository
    https://github.com/Kyklas/openwrt-galileo

  • PoshBot.XKCD

    Build status PowerShell Gallery

    PoshBot.XKCD

    A simple PoshBot plugin to retrieve URLs to XKCD images.

    Install Module

    To install the module from the PowerShell Gallery:

    PS C:\> Install-Module -Name PoshBot.XKCD -Repository PSGallery
    

    Install Plugin

    To install the plugin from within PoshBot:

    !install-plugin -name poshbot.xkcd
    

    Usage

    !xkcd
    https://imgs.xkcd.com/comics/vomiting_emoji.png
    
    !xkcd -alttext
    https://imgs.xkcd.com/comics/vomiting_emoji.png
    My favorite might be U+1F609 U+1F93F WINKING FACE VOMITING.
    
    !xkcd -random
    https://imgs.xkcd.com/comics/1337_part_4.png
    
    !xkcd -random -alt
    https://imgs.xkcd.com/comics/extrapolating.png
    By the third trimester, there will be hundreds of babies inside you.
    
    !xkcd -number 1234
    https://imgs.xkcd.com/comics/douglas_engelbart_1925_2013.png
    
    !xkcd -number 1234 -alt
    https://imgs.xkcd.com/comics/douglas_engelbart_1925_2013.png
    Actual quote from The Demo: '... an advantage of being online is that it keeps track of who you are and what you�re doing all the time ...'
    
    !xkcd -newest 5
    https://imgs.xkcd.com/comics/vomiting_emoji.png
    https://imgs.xkcd.com/comics/onboarding.png
    https://imgs.xkcd.com/comics/best_tasting_colors.png
    https://imgs.xkcd.com/comics/chat_systems.png
    https://imgs.xkcd.com/comics/xkcd_phone_5.png
    
    !xkcd -newest 3 -alt
    https://imgs.xkcd.com/comics/vomiting_emoji.png
    My favorite might be U+1F609 U+1F93F WINKING FACE VOMITING.
    https://imgs.xkcd.com/comics/onboarding.png
    'So we just have a steady flow of metal piling up in our server room? Isn't that a problem?' 'Yeah, you should bring that up at our next bismuth meeting.'
    https://imgs.xkcd.com/comics/best_tasting_colors.png
    I recognize that chocolate is its own thing on which reasonable people may differ. Everything else here is objective fact.
    
    Visit original content creator repository https://github.com/poshbotio/PoshBot.XKCD
  • aws-labs

    aws-labs

    A collection of hands-on labs to help learning the fundamentals of AWS cloud computing services. Each lab has:

    • a title,
    • a difficulty level (1-3),
    • a goal,
    • an architecture diagram,
    • a step-by-step guide, describing how to run the lab, with textual and visual information,
    • links to AWS documentation or other relevant information,
    • procedures to test and validate the lab, and
    • optional challenges.

    Supporting files such as scripts, policy documents, and CloudFormation templates are provided when relevant to completing the lab.

    I hope you enjoy these labs. Suggestions and contributions are welcomed. Thanks!

    Index

    Lab-001 – A Single EC2 Instance

    The goal of this lab is to launch a single EC2 instance in a public subnet accessible over the Internet via SSH.

    Lab-002 – A Single EC2 Instance in a Private Subnet + Bastion Host

    The goal of this lab is to demonstrate how to access an EC2 instance launched in a private subnet using a bastion host.

    Lab-003 – A Single EC2 Instance in a Private Subnet + Bastion Host + NAT Gateway

    This lab illustrates how an EC2 instance running in a private subnet can be configured to access the internet with the help of a service called Nat gateway.

    Lab-004 – A Single EC2 Instance in a Private Subnet + Bastion Host + Nat Instance

    This lab is similar to lab-003 but instead of using a Nat gateway you are asked to use a Nat instance.

    Lab-005 – An HTTP Load Balancer

    The goal of this lab is to illustrate how to use an Application Load Balancer to distribute requests over two web servers running on distinct Availability Zones.

    Lab-006 – A Simple EC2 Auto Scaling

    This goal of this lab is to illustrate how to setup a simple EC2 auto scaling service. You will create an auto scaling group with initially only one EC2 instance running. A rule will be setup to automatically launch a second EC2 instance when the CPU usage of the first instance reaches 75%.

    Lab-007 – A Simple EC2 Auto Scaling + Load Balancing

    This lab is a continuation of lab-006 with a Load Balancer added.

    Lab-008 – Secure EC2 Auto Scaling + Load Balancing

    This is lab is similar to lab-007 with a caveat: the auto scaling group is configured to create the EC2 instances in the private subnet. Also, two security groups control traffic in and out of the application load balancer and the EC2 instances (in the private subnets). To enable the EC2 instances to respond to requests coming from the internet, NAT gateways were configured on the public subnets of the VPC.

    Lab-009 – A Standalone RDS Instance Running MySQL

    This lab illustrates how to launch a standalone RDS instance running a MySQL database. An EC2 instance will also be launched to allow access to the database using phpMyAdmin.

    Lab-010 – An RDS Instance with a Standby

    This lab is similar to lab-009 with the addition of a standby RDS instance in another AZ to simulate a failover scenario.

    Lab-011 – An RDS Instance with a Read Replica

    This lab is similar to lab-009 with the addition of a read replica RDS instance, a read-only copy of the database.

    Lab-012 – A Simple Dynamodb Service
    This lab illustrates how to create and remotely access a dynamodb table. Dynamodb is a NoSQL managed database service.

    Lab-013 – An S3 Bucket Accessed via AWS CLI

    The goal of this lab is to illustrate how to create an S3 bucket and access it from a client computer via AWS CLI (command-line interface).

    Lab-014 – An S3 Bucket Accessed via an S3 Gateway Endpoint

    The goal of this lab is to illustrate how to access an S3 bucket from an EC2 instance in a private subnet using an S3 gateway endpoint.

    Lab-015 – An S3 Bucket Accessed via AWS CLI + Resource-based Policy

    This lab is similar to lab-013. However, we will be creating a resource-based policy to only allow access to the bucket if requests are sent from a specific IP address.

    Lab-016 – Moving an EBS Volume Between EC2 Instances

    The goal of this lab is to illustrate how to move an EBS volume from one EC2 instance to another.

    Lab-017 – Snapshot an EBS Volume

    This lab’s goal is similar to lab-016 but because we want to move a volume from one AZ to another we will have to first create a snapshot of the volume and then create a new volume from the snapshot.

    Lab-018 – Creating and Sharing an NFS File System via EFS

    The goal of this lab is to illustrate how to create and share an NFS file system using AWS EFS service.

    Lab-019 – Connecting to an EC2 Instance via Systems Manager

    This lab illustrates how to connect to an EC2 instance via Systems Manager, a service that offers a central place to view and manage AWS resources.

    Lab-20 – Running an Amazon ECS Sample App

    This lab illustrates how to launch a web server using Amazon ECS’s Fargate service.

    Lab-21 – VPC Peering

    The goal of this lab is to illustrate a VPC peering connection, a way to connect two VPCs using a private connection.

    Visit original content creator repository
    https://github.com/thyagomota/aws-labs

  • ffscrnsave

    (Japanese, UTF-8)

    ffscrnsave — スクリーンセーバー ビュア

    これは何?

    位置とサイズを指定してスクリーンセーバーを起動できるWindowsソフトです。
    デジタルサイネージなどにお使いください。

    使い方

    使用方法: ffscrnsave [オプション] your_file.scr
    オプション:
      -i INPUT.scr            入力ファイルを指定します。
      -x WIDTH                表示される幅を設定します。
      -y HEIGHT               表示される高さを設定します。
      -left LEFT              ウィンドウの左端の位置を指定します。
                              (デフォルトでは中央に配置されます)
      -top TOP                ウィンドウの上端の位置を指定します。
                              (デフォルトでは中央に配置されます)
      -fs                     全画面モードで開始します。
      -noborder               枠のないウィンドウを作成します。
      -window_title TITLE     ウィンドウのタイトルを設定します。
                              (デフォルトでは入力ファイル名が使用されます)
      -help                   このヘルプメッセージを表示します。
      -version                バージョン情報を表示します。

    ライセンス

    • MIT

    連絡先


    (English)

    ffscrnsave — A screensaver viewer

    What’s this?

    This is a Windows software that allows you to launch a screensaver with specified position and size.
    It can be used for digital signage and other purposes.

    Usage

    Usage: ffscrnsave [Options] your_file.scr
    
    Options:
      -i INPUT.scr          Specify the input file.
      -x WIDTH              Set the displayed width.
      -y HEIGHT             Set the displayed height.
      -left LEFT            Specify the x position of the window's left edge
                            (default is centered).
      -top TOP              Specify the y position of the window's top edge
                            (default is centered).
      -fs                   Start in fullscreen mode.
      -noborder             Create a borderless window.
      -window_title TITLE   Set the window title (default is the input
                            filename).
      -help                 Display this help message.
      -version              Display version information.

    License

    • MIT

    Contact

    Visit original content creator repository
    https://github.com/katahiromz/ffscrnsave

  • Data_Structure_and_Algorithms_Final_Project

    Data_Structure_and_Algorithms_Final_Project

    This is the source code of the final project for my Data Structure & Algorithms course.

    The provided PDF file contains all the specifications that the project had to attain to (NOTE: Everything is written in Italian, an English translation will be provided sometime in the future).

    The project had to pass a battery of automated tests, provided by an online platform, and a score was given based on the time and memory used during execution (scale: grade/30).

    The following table contains the time and memory constraints for each grade:

    Time Limit Memory Limit Grade
    14 s 35 MB 18/30
    9 s 30 MB 21/30
    6 s 25 MB 24/30
    4.5 s 20 MB 27/30
    3 s 15 MB 30/30
    1.5 s 14 MB 30L/30

    (NOTE: Due to the fact that I had to wait for the deadline to publish my source code, the above results were derived from what I remembered, therefore there might be some inaccuracies in
    a few of the grade classes and thus this table serves just as an example of how programs were scored)

    This project reached the second to last maximum score of 30/30 (no cum laude due to too much time used, even though memory-wise it was within the 30 cum laude memory requirement).

    Visit original content creator repository
    https://github.com/Ransomware3301/Data_Structure_and_Algorithms_Final_Project

  • SW-Martins-Pocos

    Sistema de Contratação de Serviço de Perfuração

    Visão Geral

    O projeto Sistema de Contratação de Serviço de Perfuração surgiu da necessidade de modernizar e otimizar o processo de contratação e gerenciamento de serviços de perfuração de poços. A motivação principal foi criar uma solução digital eficiente que facilite a comunicação entre clientes e a empresa prestadora de serviços, proporcionando maior transparência, rapidez e acessibilidade ao processo.

    Funcionalidades

    O sistema atende às seguintes etapas do processo:

    1. Solicitação de Serviço: O cliente informa os dados do local e as preferências de agendamento.
    2. Agendamento de Vistoria: O supervisor de perfuração recebe a solicitação, organiza os detalhes e agenda uma vistoria.
    3. Decisão Após Vistoria: O supervisor aprova ou rejeita o local e comunica a decisão ao cliente.
    4. Elaboração do Contrato: Caso aprovado, o gerente de vendas elabora o contrato com base no feedback do supervisor e do cliente.
    5. Aprovação Final: O cliente revisa e aprova o contrato ou solicita ajustes, encerrando o processo com a confirmação do serviço.

    Tecnologias Utilizadas

    • Frontend: React, Next.js, Tailwind CSS, TypeScript
    • Backend: Next.js API Routes
    • Banco de Dados: PostgreSQL
    • Bibliotecas e Ferramentas Adicionais:
      • jsPDF: Para geração de documentos em PDF.
      • html2canvas: Para captura de telas e integração com o jsPDF.
      • Signature Pad: Para captura de assinaturas digitais.
      • jsonwebtoken (JWT): Para autenticação segura.
      • js-cookie: Para gerenciamento de cookies.
      • Zod: Para validação de dados.

    Ambientes de Desenvolvimento

    • IDE/Editor de Código: Visual Studio Code (VS Code)
    • Gerenciador de Pacotes: Yarn
    • Servidor de Desenvolvimento: Next.js integrado com Node.js
    • Banco de Dados: PostgreSQL, configurado para conexão segura
    • Repositório: GitHub

    Estrutura do Projeto

    1. Página Inicial do Projeto: Informativa e funcional para navegação.
    2. Formulário de Solicitação de Serviços: Interface para clientes enviarem pedidos de serviço de perfuração.
    3. Painel do Cliente: Para acompanhamento de solicitações realizadas.
    4. Painel do Gestor de Vendas: Para gerenciamento de solicitações e envio de notificações via WhatsApp.
    5. Painel do Supervisor de Perfuração: Para aprovação ou reprovação de vistorias e contratos.
    6. Seção de Contratos: Controle de geração, edição, exclusão e assinatura digital de contratos.

    Marcos de Entrega

    1. Configuração do Ambiente: Estrutura inicial do projeto e configuração do banco de dados.
    2. Desenvolvimento de Interfaces: Criação das páginas principais (cliente, gestor, supervisor).
    3. Implementação do Backend: Integração com PostgreSQL e criação de rotas para gerenciamento de dados.
    4. Sistema de Notificações: Integração com WhatsApp para comunicação automática.
    5. Sistema de Contratos: Geração de PDFs e assinatura digital.
    6. Autenticação: Implementação com JWT para segurança.

    Como Executar o Projeto Localmente

    1. Clone o repositório:
      git clone https://github.com/natsalete/SW-Martins-Pocos.git
    2. Instale as dependências:
      yarn install
    3. Configure as variáveis de ambiente no arquivo .env.
    4. Execute o projeto:
      yarn dev
    5. Acesse o sistema no navegador em http://localhost:3000.

    Contribuições

    Contribuições são bem-vindas! Siga os passos abaixo:

    1. Fork o repositório.
    2. Crie uma branch para sua funcionalidade:
      git checkout -b minha-funcionalidade
    3. Realize as alterações e faça o commit:
      git commit -m "Adiciona nova funcionalidade"
    4. Envie suas alterações:
      git push origin minha-funcionalidade
    5. Abra um Pull Request no repositório original.

    Autor

    Desenvolvido por Natália na disciplina de Engenharia de Software III do curso de ADS, este projeto visa o aprendizado e a aplicação de tecnologias modernas em soluções empresariais.

    Licença

    Este projeto está sob a licença MIT – consulte o arquivo LICENSE para mais detalhes.


    Visit original content creator repository
    https://github.com/natsalete/SW-Martins-Pocos

  • TFProfiler

    TFProfiler – ready to use 🚀

    Build Status License

    Overview

    TFProfiler is an app that aims to profile your TensorFlow Lite and OpenCV DNN supported model right on the smartphone.

    Measure model performance with model initialization time, inference time, FPS, memory consumption, etc.

    Tweak model runs with different delegates (CPU, GPU, NNAPI, HEXAGON), XNNPACK option, and number of threads.

    Apply a batch processing, adjusting the number of input images. TFLite batch inference is partially supported by TensorFlow.

    Run neural models (*.caffemodel, *.onnx, *.pb, etc) supported by OpenCV DNN module.

    • Android API SDK 21+
    • Written in Kotlin
    • TFLite 2.5.0 inside
    • OpenCV 4.5.2 inside

    Features

    The app displays a list of models built inside the app that can be used to measure its performance on device. Also, you can upload your *.tflite model and see how it works on the smartphone.

    Configure delegate options     Run model     Report

    Download

    Latest apk release can be found on release page.

    Or download app via Google Play:

    Built-in models

    App has built-in models that you can play with to see how inference performance is estimated.

    Image Dataset

    The app has built-in a subset of image dataset Caltech 101. It is used for running model inteferences.

    Libraries

    Performance tips

    We can boost model performance and energy efficiency using various optimization techniques.

    Model optimization aims to create smaller models that are generally faster and more energy efficient, so that they can be deployed on mobile devices.

    1. Check ops compatibility for each delegate, CPU, GPU, XNNPACK.

    2. Use XNNPACK to boost float-point inference.

    3. Use GPU delegate to compare with CPU and other options. If some of the ops are not supported by the GPU delegate, the TF Lite will only run a part of the graph on the GPU and the remaining part on the CPU.

    4. Experiment with NNAPI (Android API 27+) delegate to see whether the models works faster on Android.

    5. Try to use quantization to optimize model.

    6. Accelerate TFLite model on Qualcomm Hexagon DSPs

    7. Experiment with version of TensorFlow Lite library

    8. Deploy different models for different devices

    Mentions

    Featured in AppTractor

    Credits

    Launcher icon was built using this one. Icons made by Becris from https://www.flaticon.com/

    Issues

    If you find any problems or would like to suggest a feature, please feel free to file an issue

    Visit original content creator repository https://github.com/iglaweb/TFProfiler
  • tvadblocker

    TV Ad Blocker

    Simple TV ad blocker that switches OBS scenes based on logo detection in the top‑right corner. Uses NDI for video input and OpenCV template matching to detect when the channel logo is visible (program) vs faded/absent (ad break).

    Requirements

    • Python 3.8+
    • OBS Studio
    • OBS WebSocket (v4) enabled
    • obs-ndi plugin + NDI runtime

    Install Python deps:

    pip install -r requirements.txt

    OBS Setup

    1. Create two scenes:
      • tv: main program
      • adbreak: what to show during ads (e.g., a calm video)
    2. Add the NDI source/filter to the tv scene.
    3. Enable OBS WebSocket on port 4444 with a password.

    Configure

    Edit config.ini:

    [websocket]
    host = localhost
    port = 4444
    password = secret
    
    [opencv]
    logo_path = logo.png
    threshold = 0.5
    interval_seconds = 1.0
    roi_width_ratio = 0.25
    roi_height_ratio = 0.25
    
    [obs]
    tv_scene = tv
    ad_scene = adbreak
    • threshold: higher means stricter logo match.
    • interval_seconds: how often to sample frames.
    • roi_*_ratio: size of top‑right region of interest.

    Replace logo.png with the channel logo (cropped and clear works best).

    Run

    python main.py --config config.ini --log-level INFO

    Notes

    • The script reads the NDI top‑right ROI to speed up matching.
    • Scenes are switched via OBS WebSocket SetCurrentScene.
    • Stop with Ctrl+C.

    Visit original content creator repository
    https://github.com/paratustra/tvadblocker

  • base-camp

    Dependency Status Dependency Status License

    About Base Camp

    Awesome WordPress starter theme with own CLI for developers based on modern web technologies.

    Features

    • Bulma (Responsive CSS framework based on Flexbox)
    • Timber
      • Twig Template Engine
      • Cleaner and better code
      • Separates the logic from presentation
    • Webpack
      • Sass / Scss for stylesheets (Minimize in production)
      • ES6 for Javascript (Minimize in production)
      • Automatic Cache Busting
      • Split javascript code to two chunks, app.js and vendor.js
      • Vuejs for boosting frontend development
      • BrowserSync for synchronised browser testing
    • Luna (Command-line interface included with Base Camp)
    • WooCommerce support with basic boilerplate.

    Requirements

    Installation

    • Go your themes folder and runcomposer create-project suomato/base-camp
    • cd base-camp
    • yarn or npm install
    • define your custom webpack config to build/config.js file
    • yarn watch or npm run watch
    • Happy developing 🙂

    Structure

    base-camp/                                          # Theme root
    ├── app/                                            # Theme logic
    │   ├── config/                                     # Theme config
    │   │   ├── wp/                                     # WordPress specific config
    │   │   │   ├── admin-page.php                      # Register here WordPress Admin Page config
    │   │   │   ├── image-sizes.php                     # Register here WordPress Custom image sizes
    │   │   │   ├── login-page.php                      # Register here WordPress Login Page config
    │   │   │   ├── maintenance.php                     # Maintenance mode config
    │   │   │   ├── menus.php                           # Register here WordPress navigation menus
    │   │   │   ├── scripts-and-styles.php              # Register here WordPress scripts and styles
    │   │   │   ├── security.php                        # Things that increase the site security
    │   │   │   ├── sidebars.php                        # Register here WordPress sidebars
    │   │   │   └── theme-supports.php                  # Register here WordPress theme features
    │   │   ├── autoload.php                            # Includes all config files (DON'T REMOVE THIS)
    │   │   ├── timber.php                              # Timber specific config
    │   │   └── woocommerce.php                         # Init woocommerce support
    │   ├── models/                                     # Wrappers for Timber Classes
    │   ├── timber-extends/                             # Extended Timber Classes
    │   │   └── BaseCampSite.php                        # Extended TimberSite Class
    │   ├── bootstrap.php                               # Bootstrap theme
    │   ├── helpers.php                                 # Common helper functions
    ├── build/                                          # Theme assets and views
    │   ├── config.js                                   # Custom webpack config
    │   ├── webpack.config.js                           # Webpack config
    ├── resources/                                      # Theme assets and views
    │   ├── assets/                                     # Front-end assets
    │   │   ├── js/                                     # Javascripts
    │   │   │   └── components/                         # Vue Components
    │   │   ├── sass/                                   # Styles
    │   │   │   └── components/                         # Partials
    │   ├── languages/                                  # Language features
    │   │   ├── base-camp.pot                           # Template for translation
    │   │   └── messages.php                            # Language strings
    │   ├── views/                                      # Theme Twig files
    │   │   ├── components/                             # Partials
    │   │   ├── footer/                                 # Theme footer templates
    │   │   └── header/                                 # Theme header templates
    

    Models

    Models are wrapper classes for WordPress Post Types and Taxonomies. They provide very simple interface to interact with the database.

    How to use

    // index.php
    
    <?php
    
    use Basecamp\Models\Post;
    
    // returns an array of TimberPost objects
    Post::all();
    
    // returns TimberPost object with the ID 1 (if it exists)
    Post::find(1);
    
    // returns first two posts;
    Post::take(2)->get();
    
    // skips first two posts;
    Post::skip(2)->get();
    
    // returns published posts;
    // Supported values: https://codex.wordpress.org/Post_Status#Default_Statuses
    Post::status('publish')->get();
    
    // returns all posts except post with ID 1;
    Post::exclude([1])->get();
    
    // returns only posts with ID 1;
    Post::include([1])->get();
    
    // returns an array of posts descending order by author;
    // Supported Values: https://codex.wordpress.org/Class_Reference/WP_Query#Order_.26_Orderby_Parameters
    Post::orderby('author', 'desc')->get();
    
    // returns an array of posts authored by admin;
    Post::author('admin')->get();
    
    // returns an array of posts which are in category 'cars' or 'vehicles';
    Post::inCategory(['cars', 'vehicles'])->get();
    

    All queries are chainable. For example you can get three first incomplete posts authored by admin:

    Post::status('draft')->author('admin')->take(3)->get();
    

    All models are able to use almost every methods. However there are some exceptions:

    • Only Post model has inCategory() method
    • Taxonomies (Category, Tag) have hideEmpty() method

    Luna (Command-line interface)

    Docs

    Visit original content creator repository https://github.com/suomato/base-camp